So, you want to buy Bitcoin automatically every month, week or even every day? In this article, I will show you three ways to automate your recurring Cryptocurrency buying from very easy, which will require no technical skills, to more complicated ways, that will require some technical skills. Let’s have a look at how to do automated recurring buys of Bitcoin and other Cryptocurrencies.
Why Buy Cryptocurrencies
Cryptocurrencies (and precious metals) are a way I hedge against inflation and all the financial madness that is going on. I do not see cryptocurrencies as a get rich quick thing, but more as some sort of security, or an alternative to fiat currencies.
I do not put all my savings in cryptocurrencies, because they do not yet have a long track record. However, I do intend to build up a portfolio over time. I want to do regular buys of fixed amounts in Euros (my local fiat currency).
Averaging in
This is called averaging in. I do not want to time the market. Instead, I buy a fixed amount in Euros. If Bitcoin is trading lower, then I can buy more Bitcoin, If it is trading higher, then I can buy less, but the value of my current portfolio has gone up.
Psychological Benefit
This makes averaging in a less painful exercise, then trying to time the market. If you do the later and your timing is right, you will feel ecstatic, but if your timing is wrong you will feel your stomach turn. I want to prevent myself from entering such an emotional roller coaster. This is especially the case with highly volatile markets such as the crypto-markets.
Three Ways to Automatically Buy Bitcoin Every Month, Week, or Even Every Day
So I looked for ways to do recurring automated buys of Bitcoin and I have found three ways of going about it:
- Recurring buying services
- Crypto portfolio management tools
- My own Crypto bot doing the automated buying
Recurring Buying Services
I have used and still use two services for making automated recurring buys:
Both these platforms allow you to automatically buy Bitcoin and other Cryptocurrencies on a preset interval and for a fixed amount. For both services, you will need to use your credit card to make the purchases.
Also both charge around a 4% fee on each recurring buy. Automating your buys this way is the easiest, but also the most expensive way to do it.
Crypto Portfolio Management Tools
A slightly more complicated way to set up your automated buying is to use fiat to crypto exchanges that you connect to a crypto portfolio management tool. Crypto portfolio management tools are usually web services that will rebalance your crypto portfolio by connecting to your account on an exchange via an API.
So if you want to automate your crypto buys, you could set up an automated recurring bank transfer from your bank to your exchange. And you can then let the portfolio management tool do its magic. If you set the tool to manage your portfolio to always be fully invested in Bitcoin, then every time fiat currencies arrive in your account at the exchange, the tool will automatically send buy orders for you to the exchange.
I know of two portfolio management tools:
- Coincube (no longer online. Will go opensource, apparently)
- Shrimpy
Coinbase Pro and Shrimpy
Here is how you would set up your Coinbase Pro account to be managed by Shrimpy.
Everyone with a Coinbase account has access to Coinbase Pro. While Coinbase is the easy to use platform to buy and sell cryptocurrencies, Coinbase Pro is the exchange where you can do advanced trading. The exchange may look intimidating, and yes it is more complicated than using the Coinbase app on your phone, but on the exchange, the fees are much lower than on the regular Coinbase platform. So, as we have seen before, convenience comes at a cost.
Transfer funds from Coinbase to Coinbase Pro
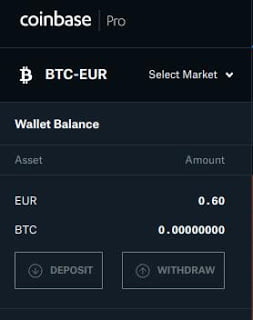
Luckily transferring funds from Coinbase to the Coinbase Pro exchange is very easy and instant. For example: if you have BTC in your Coinbase wallet, you can transfer them to Coinbase Pro by going to the BTCEUR or BTCUSD pair on Coinbase Pro and select deposit. Here you can select what currency you want to deposit.
- Deposit on Coinbase Pro
- Select the currency to deposit
- Transfer from Coinbase
Let’s say you select BTC. Here you will get a BTC address to send BTC to, or you can select the tab ‘Coinbase Account’, where you can instantly move your BTC from Coinbase to Coinbase Pro. This also goes for other cryptocurrencies and fiat currencies.
Funding our Coinbase Pro account with Fiat currency
In almost the same way we can deposit fiat currencies directly into our Coinbase Pro account. If we select deposit euros, for instance, we would see banking details for making a SEPA transfer. And this is the transfer that we could automate from our bank account.
Getting our Coinbase Pro API key
In order to let Shrimpy manage our account at Coinbase Pro, we need to connect it through the Coinbase Pro API. This is easy, but we do need to have the right credentials and the right permissions.
On the Coinbase Pro platform, there is a menu under your profile picture. In the menu, you need to click on the item ‘API’. Here you will see ‘My API Keys’. Now click on ‘New API Key’.
At the permissions section select: ‘view’ and ‘trade’. Selecting these will allow Shrimpy to view our holdings, history, etc. and to trade through the API. Do NOT select ‘transfer’ as this will allow anyone with access to the API to make transfers out of our account. And we don’t want that, now do we?
You will get two keys and a passphrase that you will need to copy over to the Shrimpy platform:
- API Key
- Secret Key
- Passphrase
Setting up Shrimpy
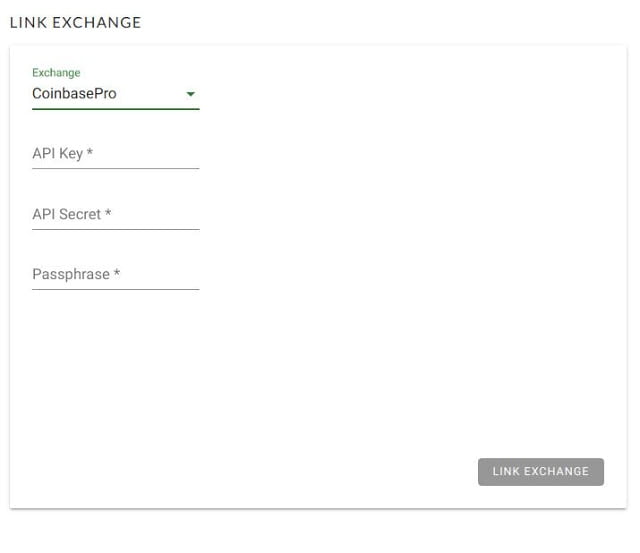
Now go over to Shrimpy and register for an account. Immediately after registering, you will be asked to select your exchange. Select Coinbase Pro and paste in the keys and passphrase.
At this point, all that is left to do is to create a portfolio on Shrimpy. After connecting to the exchange, you will be prompted to create a portfolio. Here you can select many assets if you like, but to keep it simple, let’s say we just select BTC. Once we have selected BTC, we should set the allocation to 100%. This way, whenever we deposit Euros or US Dollars to our Coinbase Pro account, Shrimpy will start buying BTC to make our allocation of BTC 100% again.
There is one more thing we need to do, and that is to set the rebalancing period. The shortest period on the free account is 1 hour. This means that within 1 hour after our funds have arrived, Shrimpy should start placing buy orders using these funds.
In the same way, you can add another fiat to crypto exchange, like for instance Bitstamp. I have used Bitstamp and although the exchange is good in my opinion, depositing fiat currencies take a couple of days and cannot be automated because every deposit needs its own reference.
At Coinbase Pro you will get one reference to your account that you can use over and over again, so you can set up recurring bank transfers. This way you can really automate the whole process. Also, I have noticed that SEPA transfers usually only take a few hours to arrive. Of course, this could be different for other bank transfers.
Coinbase Pro and your own bot running on PythonAnywhere
Now, Shrimpy is great. Their free subscription allows us to automate our recurring buys and we do not need to manage anything once we have it set up. However, some of you might not be comfortable giving third party access to our trading account at Coinbase Pro. Also, a third party makes us depend on their service. What if their service goes down? Or what if they cancel the free subscription option?
So, if you have any kind of concerns like this, then you could run your own little bot that will do the buying for you. I have written such a bot and it is available here. All you need is a computer that is always on that will run the bot. If you do not have that, then you can also run this bot on PythonAnywhere. A free account will be enough if you have the script only check every hour or even less frequent, which is perfectly OK for our purposes.
Once you have an account at PythonAnywhere and downloaded the bot, just upload the zip file you got and open up a console.
To upload a file on PythonAnywhere click on ‘files’ in the menu and then click on the ‘Upload a file’ button.
To open up a console on PythonAnywhere go to ‘consoles’ in the menu. There look for ‘Start a new console’ and click on ‘Bash’. This will open a terminal in your browser.
In the console you can unzip the zip file and move into the application directory using the following commands:
11:46 ~ $ unzip CoinbaseProCryptoBuyingBot-master.zip
Archive:  CoinbaseProCryptoBuyingBot-master.zip
890651c4588daf2397af2efef47c1e78c8bc39c8
   creating: CoinbaseProCryptoBuyingBot-master/
  inflating: CoinbaseProCryptoBuyingBot-master/.gitignore
  inflating: CoinbaseProCryptoBuyingBot-master/LICENSE
  inflating: CoinbaseProCryptoBuyingBot-master/README.md
  inflating: CoinbaseProCryptoBuyingBot-master/config.ini.example
  inflating: CoinbaseProCryptoBuyingBot-master/main.py
  inflating: CoinbaseProCryptoBuyingBot-master/requirements.txt
11:46 ~ $ cd CoinbaseProCryptoBuyingBot-master/
From here you can follow the setup instructions in the readme file.
At this point, you are in an editor ready to configure the bot. Paste in your API credentials and set your fiat currency and the cryptocurrency you want to be buying. When you are done press Ctrl + o to save the changes and Ctrl + x to exit the editor.
Now you can start your very own Crypto Buying bot with the command:
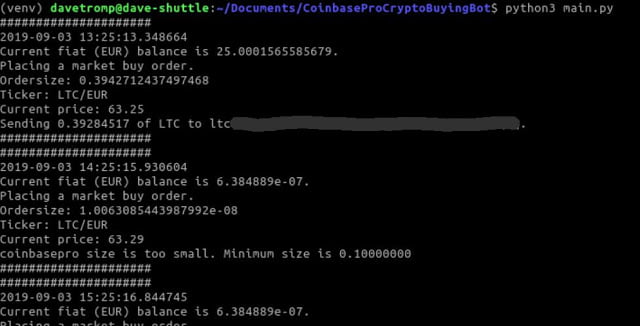
python3 main.pyThe bot will run continuously on the paid version of PythonAnywhere and every time new fiat funds arrive the bot will purchase the specified cryptocurrency for you.
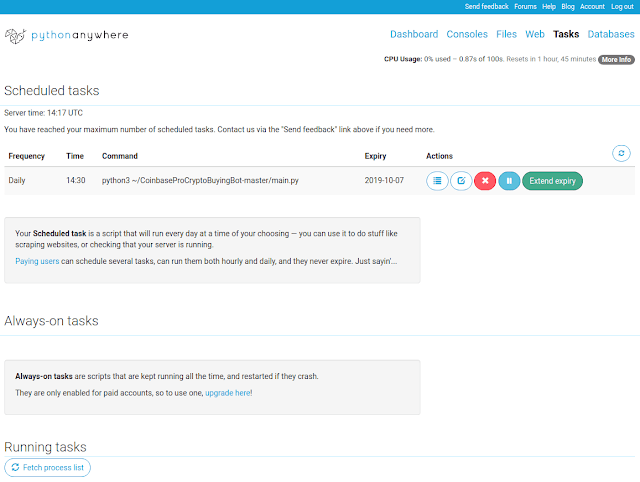
If you are using the free version of PythonAnywhere, then you can set a scheduled task to run the bot once a day and have your automated buy done within one day after the fiat funds arrived in your account.
Get your own bot for free
You can get your own bot for free and open a Coinbase account through my link. Just follow these steps:
- Open your Coinbase account.
- Go to the download page for the bot.
- Click the download now button.
Pros And Cons of The Three Ways to Automatically Buy Bitcoin
Coinbase and Bitpanda Recurring buys
Pros:
- It is easy.
- You can manage everything from the app on your phone.
Cons:
- It is expensive (4%)
- You need a credit card.
Using Shrimpy to do the buying on Coinbase Pro
Pros:
- Shrimpy is relatively easy to set up with Coinbase Pro. No technical / dev / it skills needed.
- Shrimpy is free to use
- Coinbase Pro fees are much lower than Coinbase fees
- You can set up automated buys using funds that you wire in via bank transfer. No credit card needed.
- You can see the equity curve of your holdings in the dashboard.
- You can add other exchanges.
Cons:
- You will need to set it up using Coinbase Pro API keys
- You will need to trust Shrimpy
Running your own bot to do the buying on Coinbase Pro
Pros:
- It is free to set up
- Coinbase Pro fees are much lower than Coinbase fees
- You can set up automated buys using funds that you wire in via bank transfer. No credit card needed.
- You can control everything yourself. There is no need to trust a third-party application.
- You can automatically withdraw your crypto to your own wallet after buying (I added this as an option).
Cons:
- You will need to have some technical / dev / it skills to set it up.
- You need to host the bot somewhere.
- You need to manage the bot yourself.
Conclusion
If you do not have any technical skills, or just don’t want to be bothered with technicalities, then setting up recurring buys with the Coinbase or Bitpanda app is the way to go. However, if you are willing to take some effort to set up recurring buys with Shrimpy and Coinbase Pro you can save significantly on fees over time. And if you want to do it all yourself while saving on fees at the same time, then feel free to get my bot.


