 |
| Ubuntu on my computer |
In this article I will guide you in getting Ubuntu running on your computer and a way that switching to Ubuntu is easy and that you will feel comfortable doing so. There are different ways you can run Ubuntu on your laptop of pc. The two basic ones are:
- Run it Live
This means Ubuntu will run on your system without being installed and without making any changes to your current system. This is great to test Ubuntu or to us it to recover information from a broken system for instance. - Run it Installed
Ubuntu can either replace your current system entirely, or it could be installed next to your current system, so you can switch between them (dual boot).
Getting Ubuntu
First let’s see how we can get out copy of Ubuntu. We will be getting the standard image, that will allow you to boot into a live running Ubuntu system with the option to install it as well.
Check out this video that explains the whole process:
Go to www.ubuntu.com
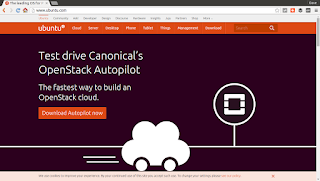 |
| www.ubuntu.com |
Somewhere it should say: Download. Click there and it will take you to a page with all the different download options.
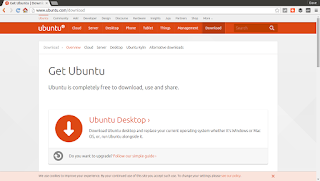 |
| Ubuntu Download page |
You will need to choose the option for Desktop. When you are at the Download Ubuntu for Desktop page you will usually see two versions that are available for download.
 |
| Download Ubuntu for Desktop |
- One is the LTS vesion.
- The other is the Latest version.
The LTS version is the Long Term Support version. This version comes with 5 years of security and maintenance updates. This is great because it means you will not have to upgrade your system for a long time.
However, if you want the latest and greatest of Ubuntu then you may want to download the Latest version. This one has 9 months of security and maintenance updates. This means you will have to upgrade your system about every year, but it is best to keep up with the latest version and upgrade every half year. This is not to complicated, but it is something to keep in mind.
Most people best choose the LTS version as it is less of a hassle and still features reasonable up to date software.
So let’s say you want to download the LTS version, then you still need to choose between the 32-bit and the 64-bit version. The 32-bit version will work an all machines (PCs), but if your machine it a 64-bit machine the 64-bit Ubuntu version will have better performance. As a rule of thumb, you can assume that if your computer or laptop had less then 2 GB of RAM installed, you best choose the 32-bit version, else you can best choose the 64-bit version. Also, almost all new machines will be 64-bit machines. So once you chosen your bit version, press download and you will be taken to the final download page.
 |
| Support Ubuntu |
Here you will be asked to make a small donation, that will help the Ubuntu project. If you are new to Ubuntu and just want to check it out you can click the not now take me to the download link. This will start the download of the Ubuntu iso file image and takes you to the thank you page.
 |
| Thank you page |
Once the file is downloaded you can burn it on a DVD or put it on an USB stick. I will not explain how to burn the image to DVD as this should be a fairly standard operation and most people will opt for booting from USB. If you do need a DVD, but you somehow cannot burn a DVD, then you can always buy a Ubuntu Desktop DVD from the Canonical store.
Putting the Ubuntu iso image on to a USB-stick
Getting your freshly downloaded Ubuntu image is actually quite easy.
The Ubuntu way
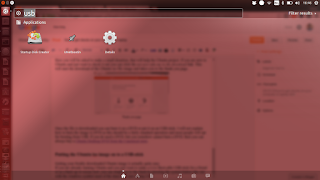
If you are already running Ubuntu and you just want to make a Live Boot-able USB stick for a friend or as a back up or rescue tool, you can simply go to the Dash by pressing the system button (the one with the windows symbol most of the time) and start typing USB.
 |
| The Dash – Ubuntu’s application launcher |
The Startup Disk Creator application will show up. Click it and it will show up. It will probably find your new iso image automatically and maybe also some old ones. Select the one you want and insert a USB stick. Select this USB stick as the disk to use. If you have enough disk space on the USB you can also create an additional disk image on the stick that will be able to store settings, files, additional apps, etc. while you are running from the USB Live. Very handy! Now just press the make startup disk button and you are as good as done. You will need to provide your system password as the application will install a boot loader on to the USB-stick, which requires root privileges.

The alternative way
Now, there is another way to create a live USB-stick that works on Ubuntu, Windows and MacOSX alike. The tool you will use is called Unetbootin, or Universal Netboot Installer. It works the same as the Ubuntu Startup Disk Creator, but besides only taking in Ubuntu iso images it can also make Startup Disks for many other linux distributions. It will even download the needed files for you. However I advise you to download the Ubuntu files as described above, so you can be sure where the files are coming from.
Also check out this video:
 |
| Unetbootin windows exe file |
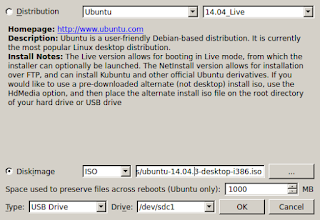
For windows systems you simply download the exe file and it will start by clicking on it. You will immediately see a window appear like this.
 |
| Unetbootin program window |
In windows at Drive, it will probably name a drive by character, like X: or Z:. Besure to select the correct one as the drive will be overwritten. At diskimage simply set the iso image you just downloaded, press OK and sit back while your Live USB Stick is created.
So now if you stick the USB into a usb-port of your computer and boot from the usb, you will end up with the Ubuntu Desktop. You can have your computer bootup from a USB by pressing a special key combination right when your computer is starting up. On a Mac I believe the combination is command + c. On most windows computers it is most likely the f2, f12 or esc button that needs to be pressed at boot. This entirely depends on your system. Most systems show a message in the startup screen telling you what buttons do what.
In the next article we will look at how to run Ubuntu Live and then how to install it as your main operating system.
If you liked this post, please subscribe, like and share.
